After you have introduced yourself in the basic configuration of a Template you are prepared to learn how the so-called "data1.io Template Framework" is configured in order to be able to use your own (existing) Exce files for data1.io collection workflows.
The most important
Named Ranges in this section (overview):
- data1_CELLS01
- data1_CELLS01_ColumnDefinition
- data1_CELLS01_RowDefinition
- data1_CELLS01_DATE01
- data1_CELLS01_DIM001
- data1_CELLS01_DIM002
- data1_CELLS01_DIM003
- ...
- data1_CELLS01_DIM010
- data1_CELLS01_ByColumnMapping
Please follow the rules for named ranges in the data1.io Workbook Framework.
Download the default workbook
Let`s start in the Workbook Wizard with a Full reset and download the workbook as an Excel File:

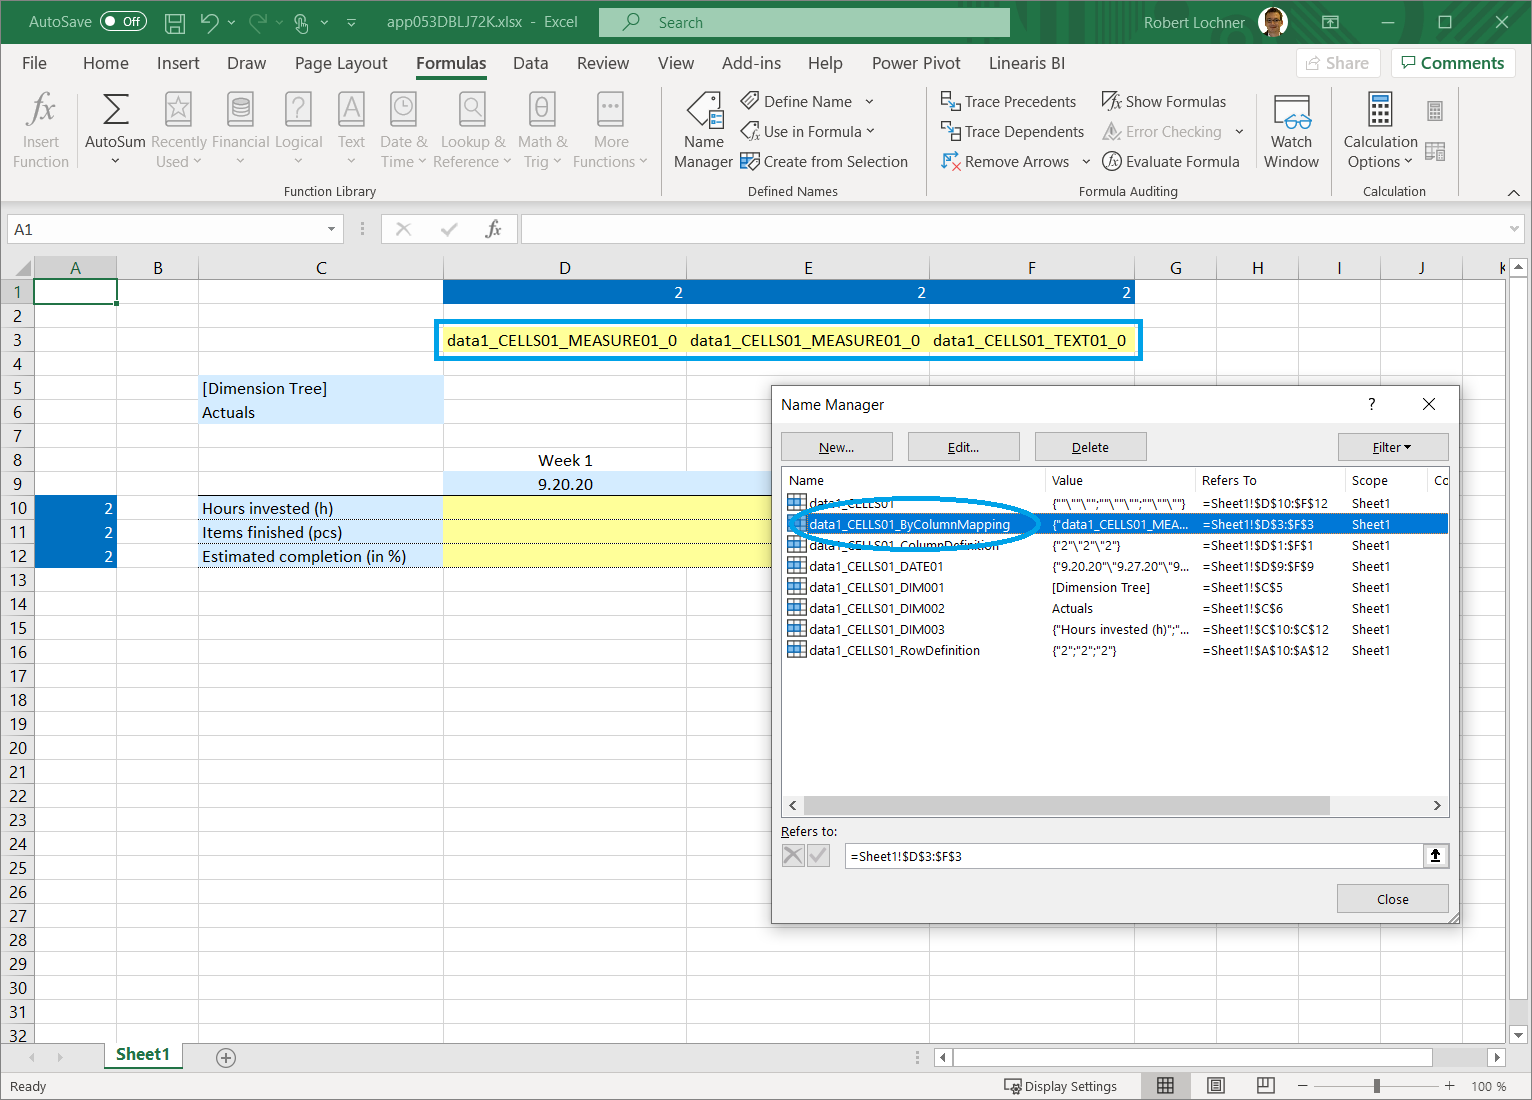
Open the file in MS Excel and open the Name Manager:
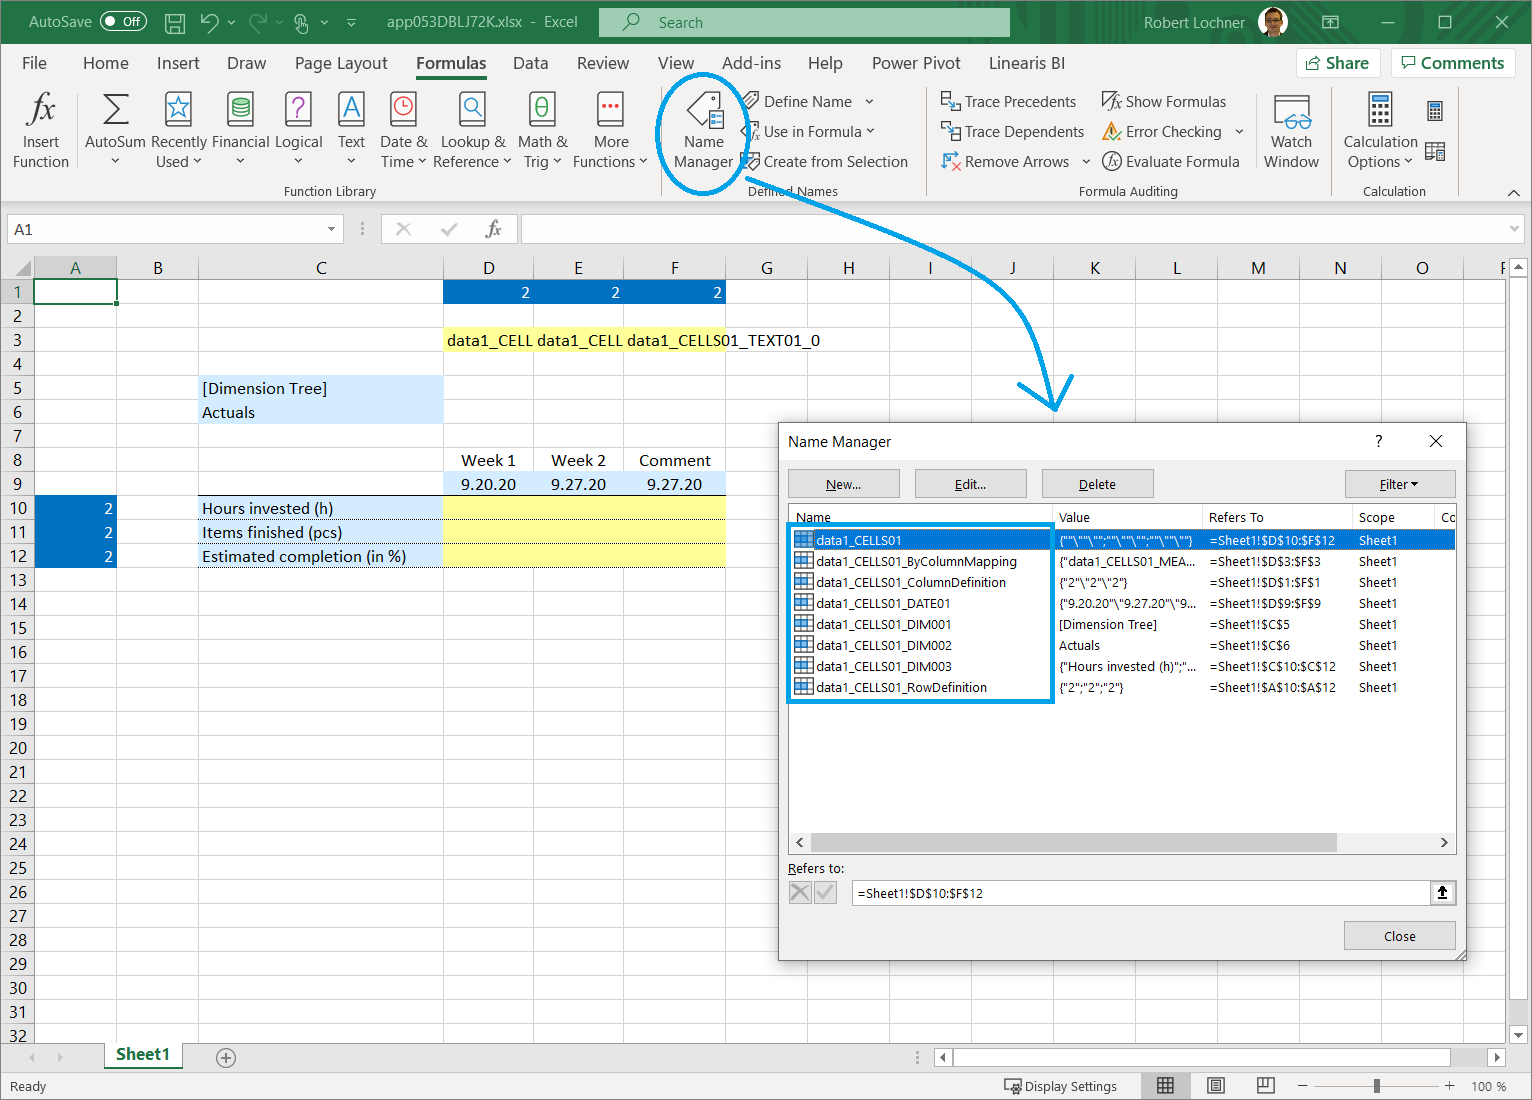
As you can see the Template Wizard has created 8 named ranges in order to activate this Excel file for READ/WRITE communication with your data1.io application.
Named Range "data1_CELLS01" for the data entry cell range
The core of all is the named range "data1_CELLS01". These are the cells where your Collector Users will enter their data:
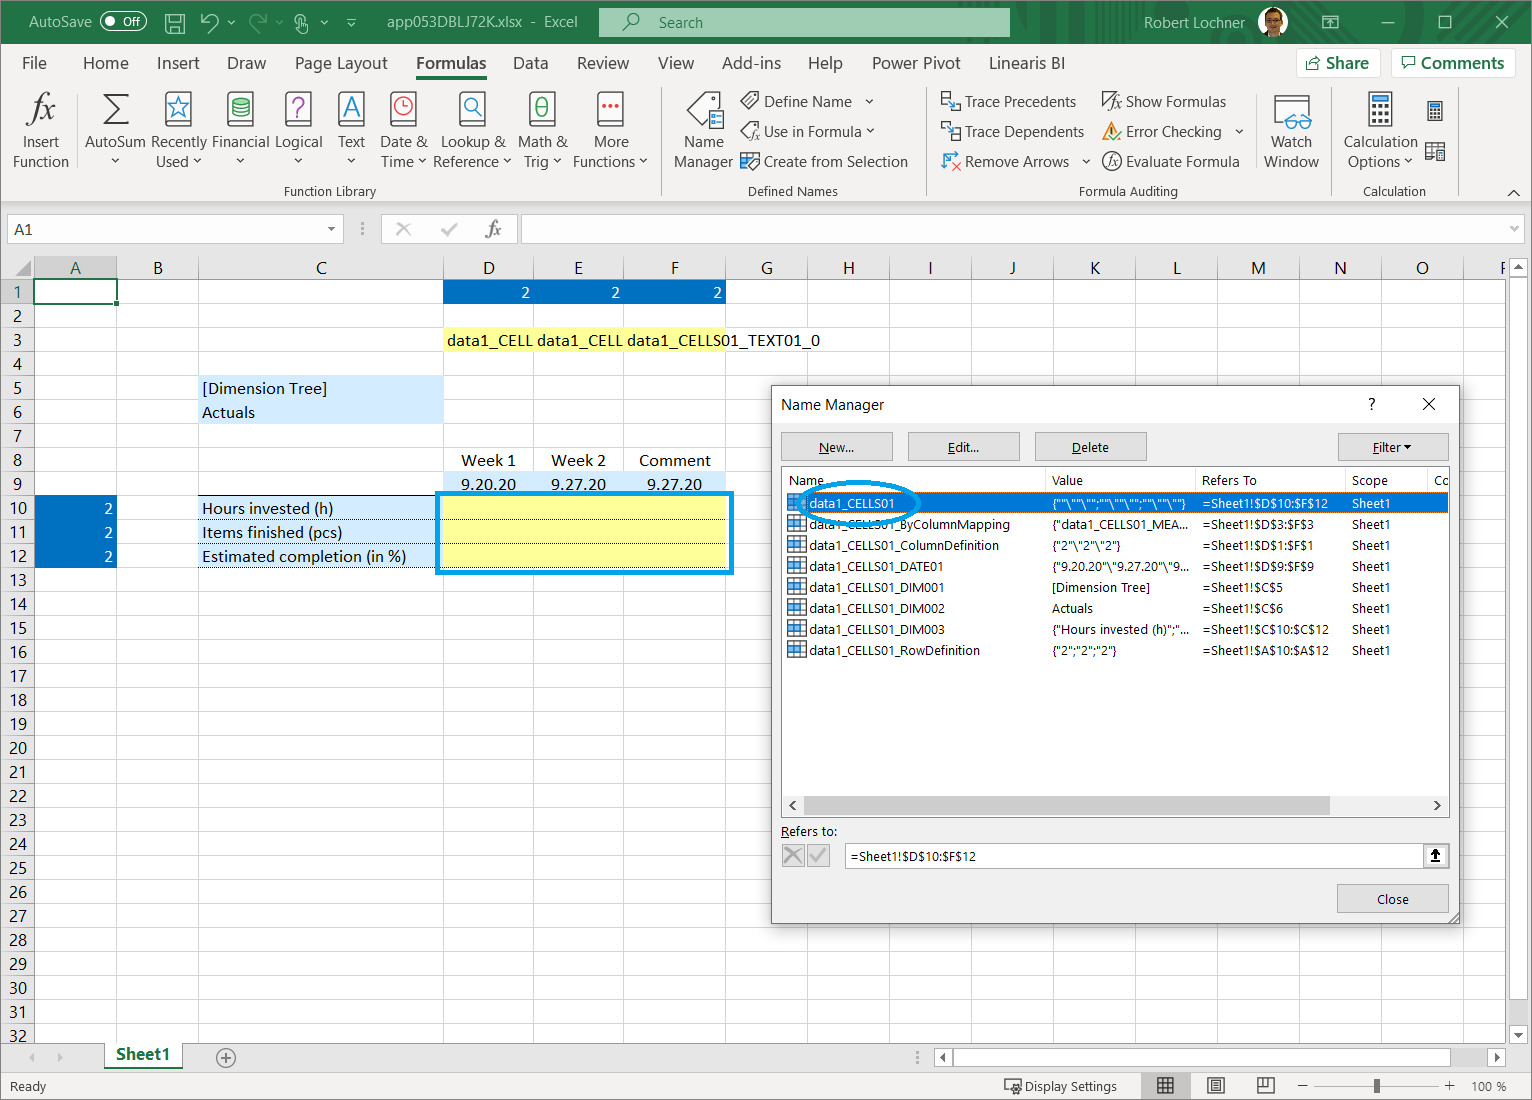
More excactly, it is the cell area from the first data entry cell "top left" until the last data entry cell "bottom right" (so it must always be a rectangle of connected cells). As you will learn a little later, there can also be R/W deactivated rows and/or columns within this area.
Named Range for the R/W control panel
We call the two named ranges "data1_CELLS01_ColumnDefinition" and "data1_CELLS01_RowDefinition" the R/W Control Panel. It directly controls how the cells within the "data1_CELLS01" range are treated in the READ and WRITE process:
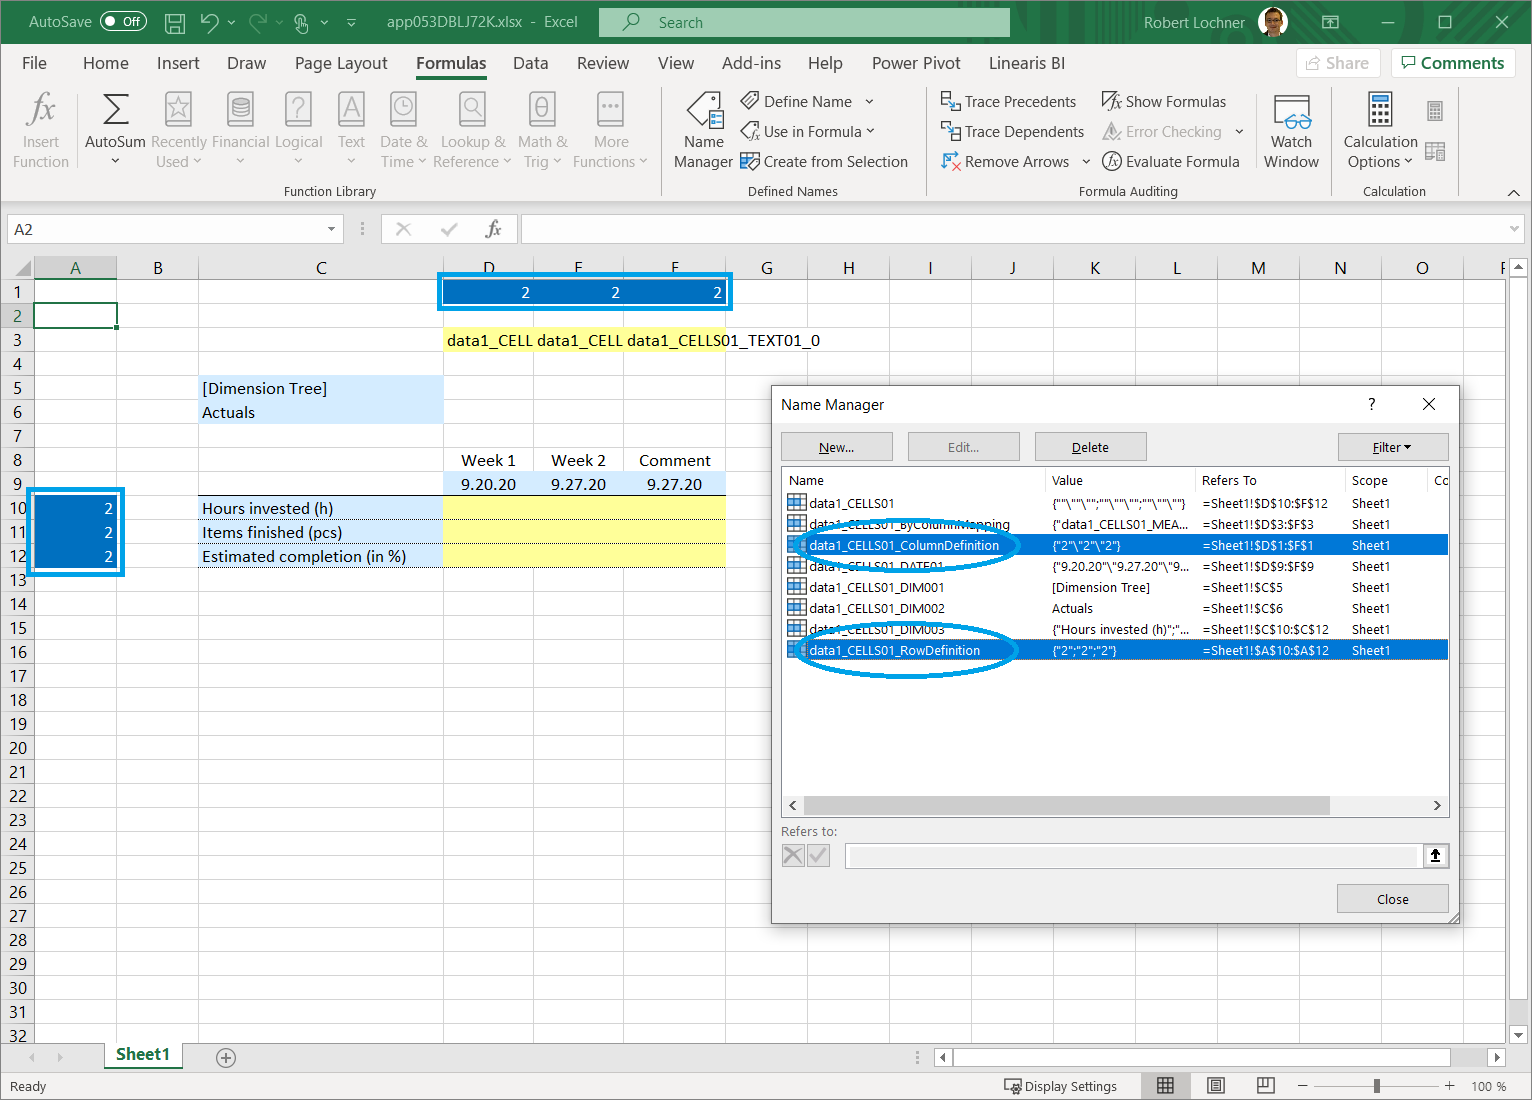
"Double 2" on the crossing of the two panels means that the cell is activated for the READ and WRITE process. Learn more about the R/W control panel here ...
Named Ranges for Dimension Mapping
Every value in a cell of the "data1_CELLS01" range is defined by dimension keys which are used as filter criteria in the READ process and are used as values for the dimension columns in the Fact Table during the WRITE process:
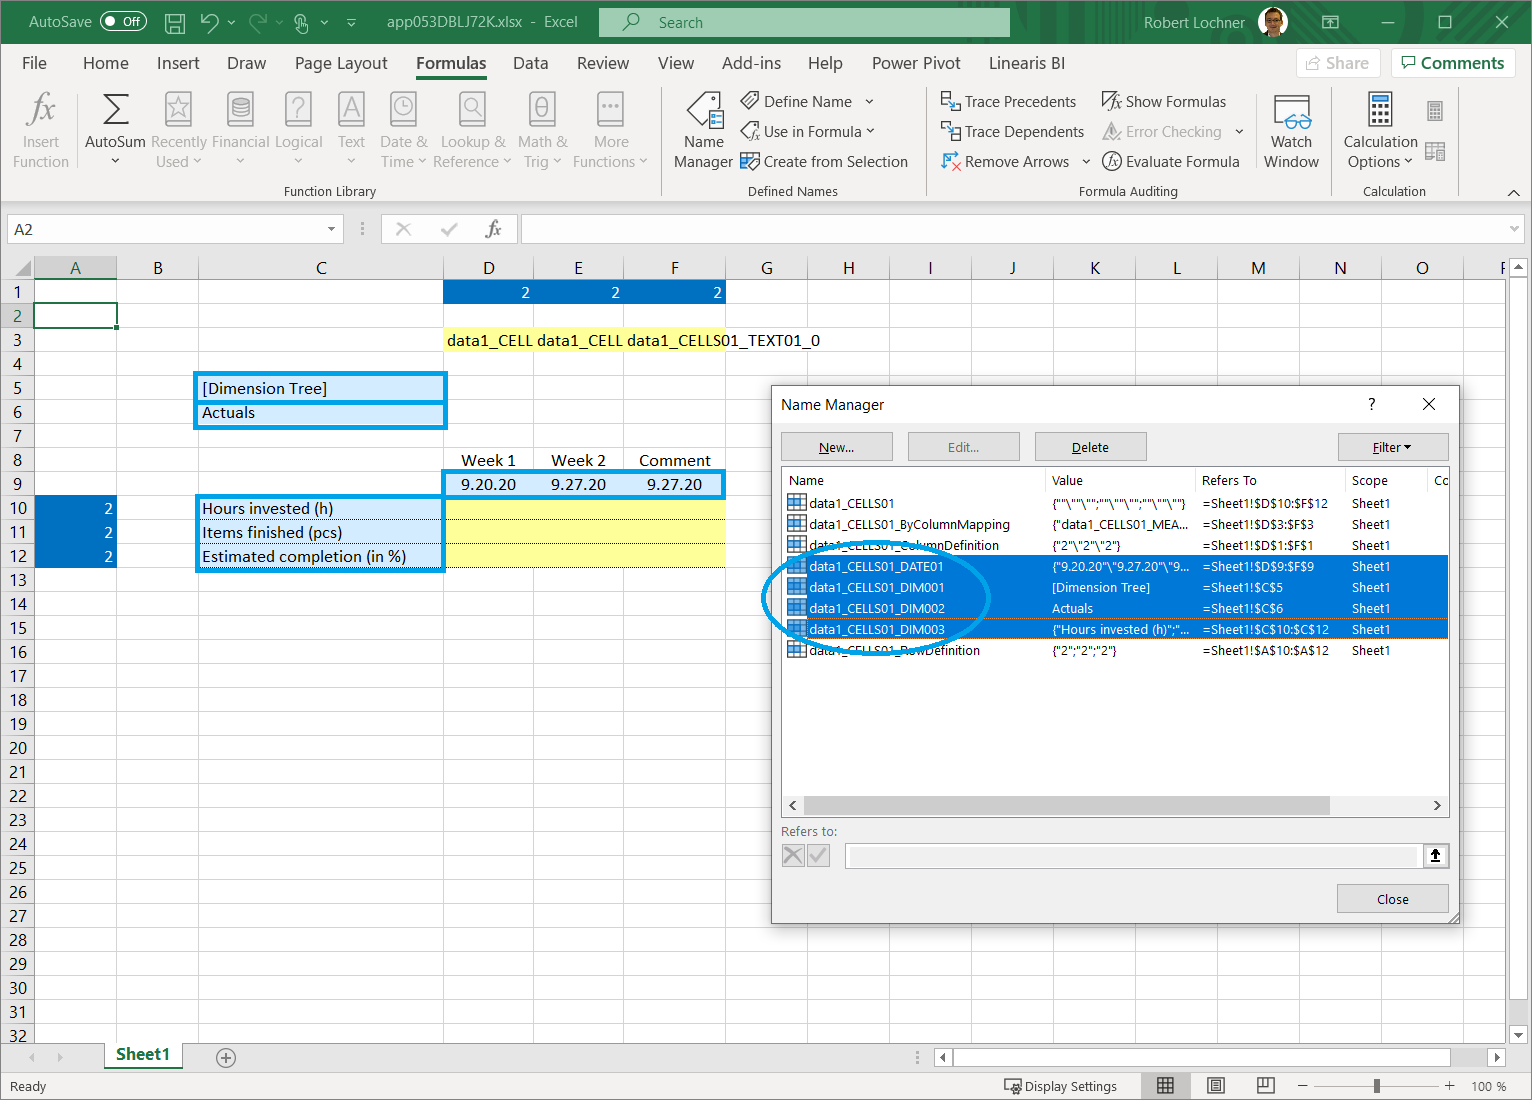
The named ranges for the dimension mapping can have 3 different formats:
- 1 cell = field value
- more cells horicontal = column value
- more cells vertical = row value
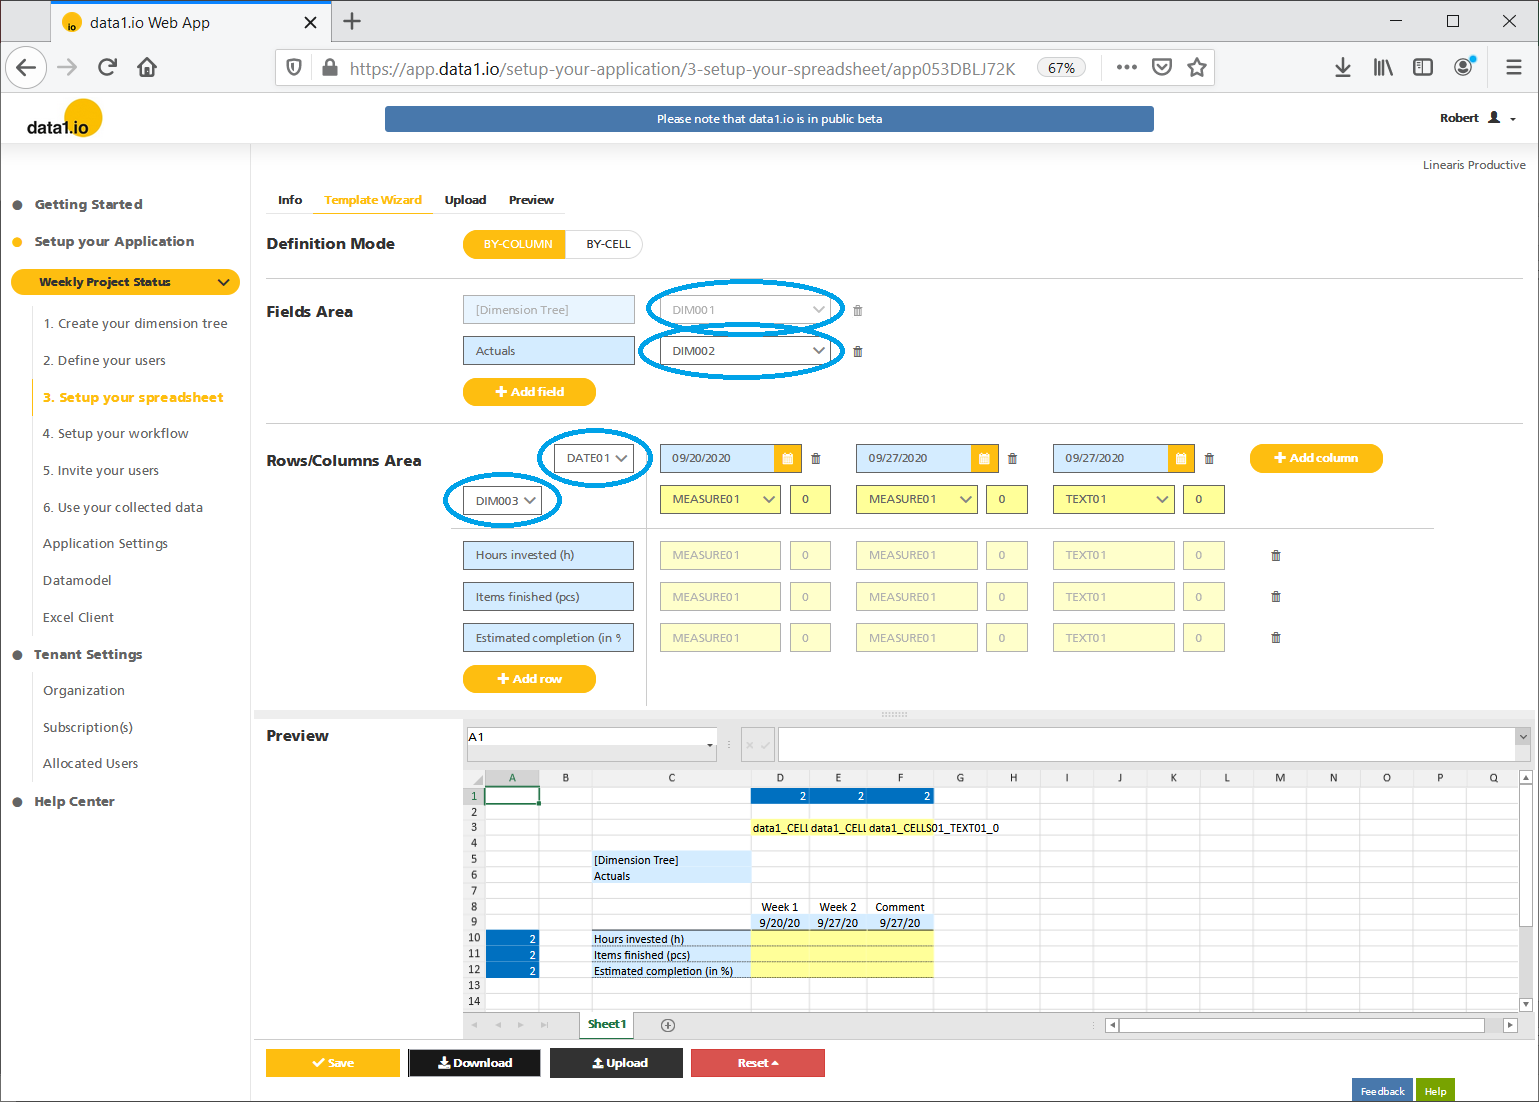
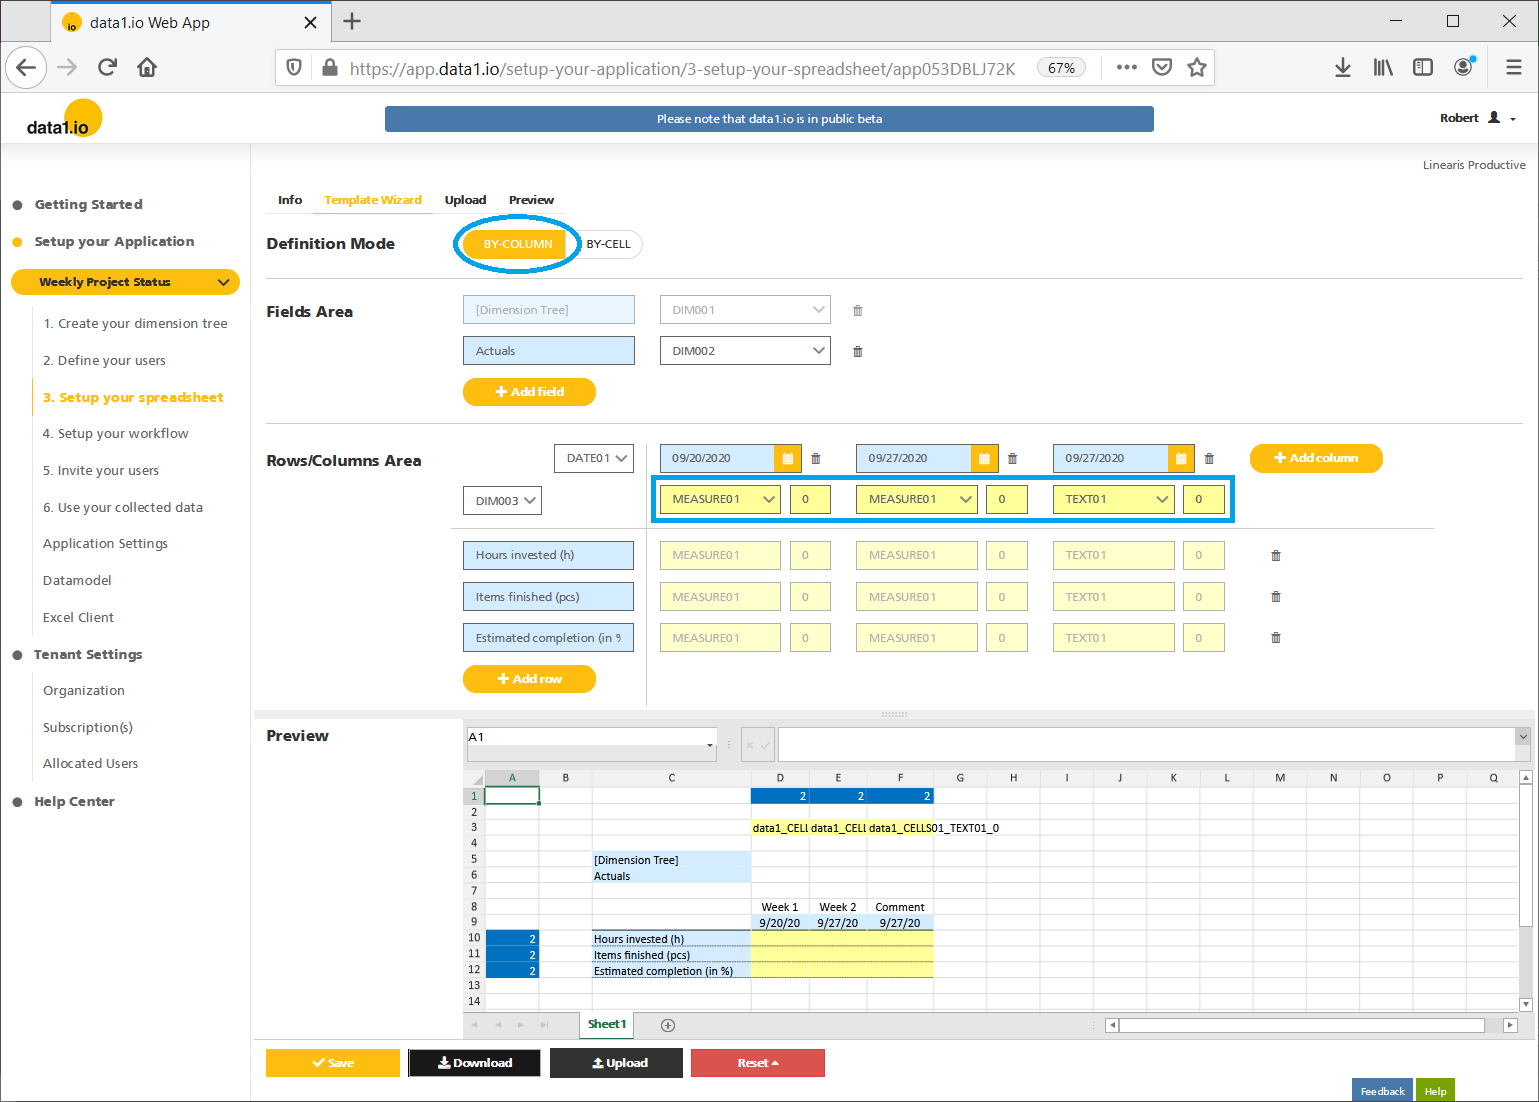
Please be aware that the suffix for the dimension in the named ranges comes from the definition in the Template Wizard:
Named Range for Measure Mapping
The measure mapping is done by the named range "data1_CELLS01_ByColumnMapping". The entry in the cells - which are treated as column definitions for the corresponding cells in the "data1_CELLS01" - consist of two parts:
- Measure field or Text field in the Fact Table (here: "Measure01" and "Text01")
- Relative Record ID (here "0" since at this time this feature is not active in the "By Column" mode)
Please be aware that the "By Column" mode and the measure mapping comes from the definitions in the Template Wizard:
Now you are prepared to enrich your own Excel File and upload it into your application!
Of course we recommend to start with the smallest possible piece of your existing Excel solution to keep things simple and clearly arranged.